Wednesday, February 29, 2012

Subway Art {Free Printables & a Tutorial}

I love subway art. I'm not sure what about it makes me love it, but it's just very pleasing to the eye. The other day, I was browsing around Pinterest {where you can find a lot of examples of subway art} and found this one for Easter. Yes, I said Easter and we're just getting started in March. It's technically not even Spring yet, but I think Easter should be celebrated all year long. So, I printed it out and just happened to have the perfect frame I had bought from Goodwill awhile back to put it in. It is matted, but has no glass. It's perfect!


 Here are some others you might like:
{source}
{source}

My brother made me these for Christmas and I just love them! I'm still waiting for Hubs to hang them up, though. Maybe tomorrow I can get him to do it!

If you'd like to make your own, I found a great tutorial! I'm totally going to give it a try! Can't have too much subway art!

Tuesday, February 28, 2012

How to Make a Doll Skirt {tutorial}

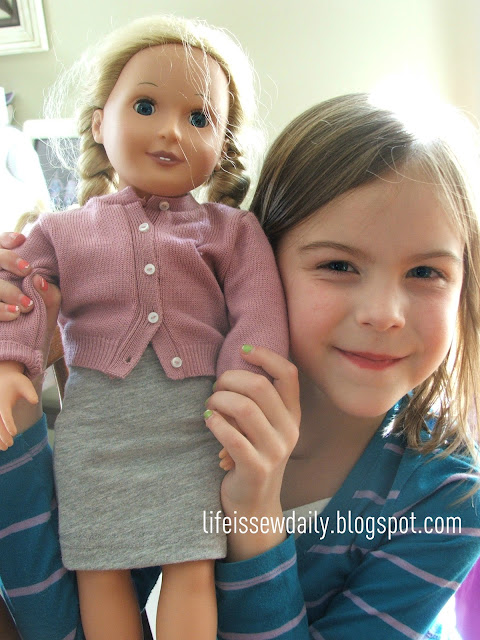
My older girls are really into their American Girl and Our Generation dolls right now and one thing they love to do is change their doll's clothes. I'm not really into paying a fortune for doll clothes, so when I was wondering what to do with some old t-shirts, I realized they'd be great for doll skirts. Using the bottom half of the t-shirt is ideal for making little doll skirts. I had cut the top half off of a gray t-shirt the other day while making a dress so I used the leftover t-shirt for my fabric today. It was a size 6 shirt.


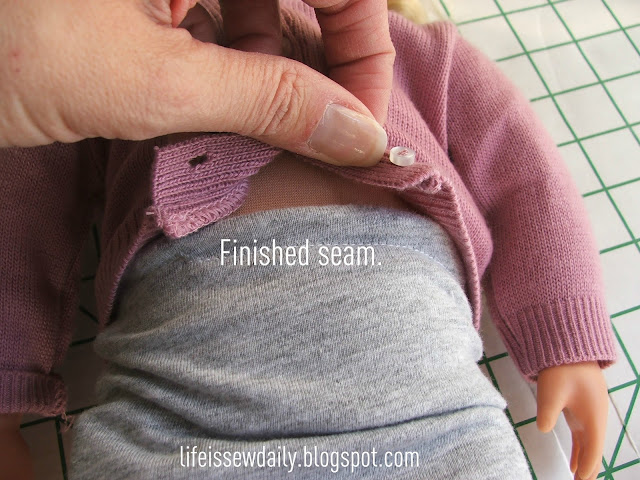
This stretchy knit fabric and elastic waist are perfect for these dolls! Easy for children to put on and take off of their dolls all by themselves! And a great way to recycle old t-shirts.

From Shirt to Skirt {Tutorial Link}

Last Fall, my sister over at Less-Than-Perfect-Life of Bliss, wrote about how to make a Ladies' Skirt out of a man's shirt. Well, I immediately went to the closest thrift store in search of shirts that I could cut up and make skirts out of. I found a few, came home and started cutting up a cute plaid shirt to make a skirt for my oldest girl. I got the two side seams sewn when my sewing machine decided to act up. So, I quit working on it and set it aside. I sort of forgot about it until last week when I was cleaning out my stash of projects-to-work-on. And thanks to Hubs for getting me a nicer, more reliable sewing machine for Christmas, I finished it. This time around I tailored it for my middle girl and it works perfectly for her! So, here are my pics. Go check out the extensive tutorial here.


If you make one, leave me a comment with a link to yours! I'd love to see more of these! I love the snaps on this one instead of buttons and my girl loves the pockets!

Monday, February 27, 2012

Drop It and Mop It {Tutorial}

This may well be one of the most used items in my kitchen. The Drop It & Mop It is perfect for cleaning up small spills or drips of water after emptying the dishwasher or getting water from the fridge. My aunt gave me one of these from a trip to Hawaii and I have been using it for years. It is a part of my kitchen and it gets daily use. I've had people look curiously at it, but when I tell them what it is, they love it! So, I decided to do a tutorial for you in case you wanted to make one for yourself. This tutorial is mostly pictures, so pay attention!


Next, you will need to make some cording that will be used for the flip flop strap.
{Go here for a tutorial on how to make cording....}


I'm linking up to these parties today:


mop it up mondays

Sumo's Sweet Stuff


Sew Chatty

The Shabby Nest

Friday, February 24, 2012

Favorite Things Friday

Here are a few of my favorite things I've come across that I think you'll love, too.
I love this State Pillow by Less-Than-Perfect-Life of Bliss and the tutorial is so easy to follow! This is on my to-do list!
I found this on Pinterest awhile back {the link on there no longer works, so I can't give you a source}, but I had already made one of these for my youngest in a tank dress version with some pale blue material. Loved it! Super easy! Maybe I'll do a tutorial one of these days.
{source}
I don't know about you, but I love me some t-shirts of the ruffled variety. And you just can't find them everywhere, so why not make your own? I'm totally going to give this a try....one day.
These colors are my fabric love language. I love everything about this pic. And hopefully, I'll be using them in my big girl's room later this year. Her room is currently pink. She's 8 1/2 and has declared {on more than one occasion} that she is sick to death of pink. Can I let you in on a little secret? SO AM I. So, bring me some aqua and red. Pronto.

And that, Folks, wraps up my favorite things for the week. What are your favorite things? Are you on Pinterest? If so, leave a comment with your Pinterest name and I'll follow you. You can follow me here.

Thursday, February 23, 2012

Milkmaid Skirt {Tutorial Link}

I have three little girls so anytime I find a cute skirt tutorial, I'm probably going to put it on my list of things to sew. I found the cutest skirt that I know my littles will love to wear. It's going to be great for summer! And I've found some lovely bright colored fabrics for this project.

You can find a great tutorial here. I couldn't have said it better myself. Check out crafterhours.blogspot.com for more great project ideas! It's a fun, informative blog!

Here are the pics from my skirt!


I'm linking this post up to these parties:

The Shabby Nest


Wednesday, February 22, 2012

30 Minute Ruffle Skirt {Tutorial}

If you know how to sew a straight line, you are going to love this skirt! It literally takes only three straight lines of sewing to make this skirt. In fact, you probably do more cutting and folding than you do sewing - and the best part? You don't have to hem this!! I'm not a big fan of hemming. I don't know why really. It's not that hard. But this fabric doesn't ravel or fray. You're going to love it!

Materials:
I bought my ruffle fabric at Hobby Lobby for 10.99/yd {Use the 40% off coupon and it's a GREAT deal!}. I only needed 1 yard. Then, I bought poly-satin in silver for 2.99/yd. Used 1/6 of a yard for this skirt. And I already had some elastic on hand.
*Measure the waist that will be wearing this skirt. Then, take that measurement and add 4-5 inches. We will be using elastic for the waist, so that extra 4-5 inches will be good for gathering.
*Measure the length you want and carefully cut your fabric to meet your requirements. {See pic below for a great tip.}
*Now it's time to sew your seam. {I put mine in the back of the skirt.} Place right sides together and sew your seam from top to bottom. I use a 1/2 inch seam. Remember this fabric is stretchy, so slow and steady is best. {See pic below.}
*Now, for the waistband. Take your coordinating fabric {I chose poly-satin} and cut the length the size of your subject's waist + a couple inches gathering and finishing. For a 1.5 inch wide waistband, you'll want to cut a 6" wide piece {We'll be folding this waistband over twice to get our finished width.}

*Fold in half, iron. Then, fold again and iron. {Just like making a bias tape.}


*You can sew a straight seam down that opening, if you wish, but I left mine open.
....And the finished result!

The best part?? I got three skirts out of this 1 yard of ruffled fabric for my three girls who are 8, 6 and almost 4. Better than thrift store prices and it's brand new!

I'm linking this post up to this party:
The Shabby Nest