Showing posts with label party. Show all posts

Wednesday, December 18, 2013

The Easy Way to Make a Gingerbread House

Last week my daughter's teacher called to ask me if I could put together all the gingerbread houses for her kindergarten class. The kindergarten classes at our school always do gingerbread houses at Christmas and it's so much fun for them. So, when I picked Annie up on Friday, she was loaded down with supplies!

Yesterday, I sat down to make 26 houses for the class so that today they could just enjoy decorating them. And I thought the process was genius! No one really eats the gingerbread house when it's dried up, do they? So, the teacher's idea was perfect. I thought you might like to try it sometime whether in your own home or in a classroom setting. This way is the perfect way to build your house without it crashing down on you.
Take a pint size milk carton - or on a larger scale, you could use an almond milk carton and cut the bottom piece down to the size you desire and make sure it's empty and rinsed.
Fire up the hot glue gun! Get it nice and hot then glue down the bottom of the carton to a paper plate (or whatever base you want to use).
Next, use graham crackers to cover your house. You can use them whole, break them into squares or rectangles. Glue them onto your house so that all flat sides are covered.
Then, use store bought icing such as Pillsbury Classic White or even better - the frosting in the can that you can squirt onto the house! This worked like a charm with the kindergarten class! The kids used large popsicle sticks to spread their icing all around the sides and roof.
Finally, decorate with all the usual colorful candies - gumdrops (my favorite on a gingerbread house), M&Ms, Red Hots, Candy Canes, Gingerbread Men Cookies, etc. etc.
It was so much fun! And tomorrow, the Kindergarten will have a "Tour of Homes" and go around to each Kindergarten class and look at all the colorful creations they made today. It's a big deal, you know.

Does your family make a gingerbread house each year? We have only done it once. It was an ordeal. But this way is much easier and less stressful. Still messy, but it won't fall down.

Merry Christmas!
post signature

Thursday, December 5, 2013

Did Somebody Say Party?? OREO Cookie Balls {Recipe}

This recipe comes from my food allergy blog, Living the Allergic Life. It's one I developed into a dairy-free, nut-free, and egg-free version for my daughter to enjoy, but it would be just as delicious using milk based products instead. Give it a try! These are so easy and yummy, you won't be able to stand it!!

Let me introduce you to Milk's favorite cookie ball! Yes, it is made with OREOs. {I used Whole Foods brand because I was there and didn't want to make another stop just to get OREO brand, but OREO brand is still free of dairy, nuts and eggs.} I have sent these to school as a class treat and make them during the holidays for a special treat. Always delicious!

You'll want to have these things on hand:
  • OREOs
  • 8 oz. Cream Cheese {I used dairy-free}
  • 1 bag chocolate chips, any flavor {I used vegan}
  • Candy Sprinkles


Then, you'll want to freeze these cookie balls for about 10 minutes. While they are setting up, melt your vegan chocolate chips {for every 6 oz of chips, add 1T shortening - this will aid in the dipping process} in a microwave safe bowl on high for 1 minute. Stir, then continue heating/stirring every 15 seconds until completely melted and liquid. Dip the cookie balls in the melted chocolate and immediately sprinkle with fun sprinkles. Once done, put them back in the fridge for about 1 hour.

What's one of your favorite snacks to make for the holidays? If you have a blog post about it, link yours in the comments. I'd love to see what you make!

Like this post? Will you please share it with your friends on your social media? You can also follow me on Facebook, Google+, Pinterest and Twitter. Click the social media icon of your choice in the right sidebar.

Thanks for stopping by! Sharing this with a few of these friends.
post signature

Wednesday, December 4, 2013

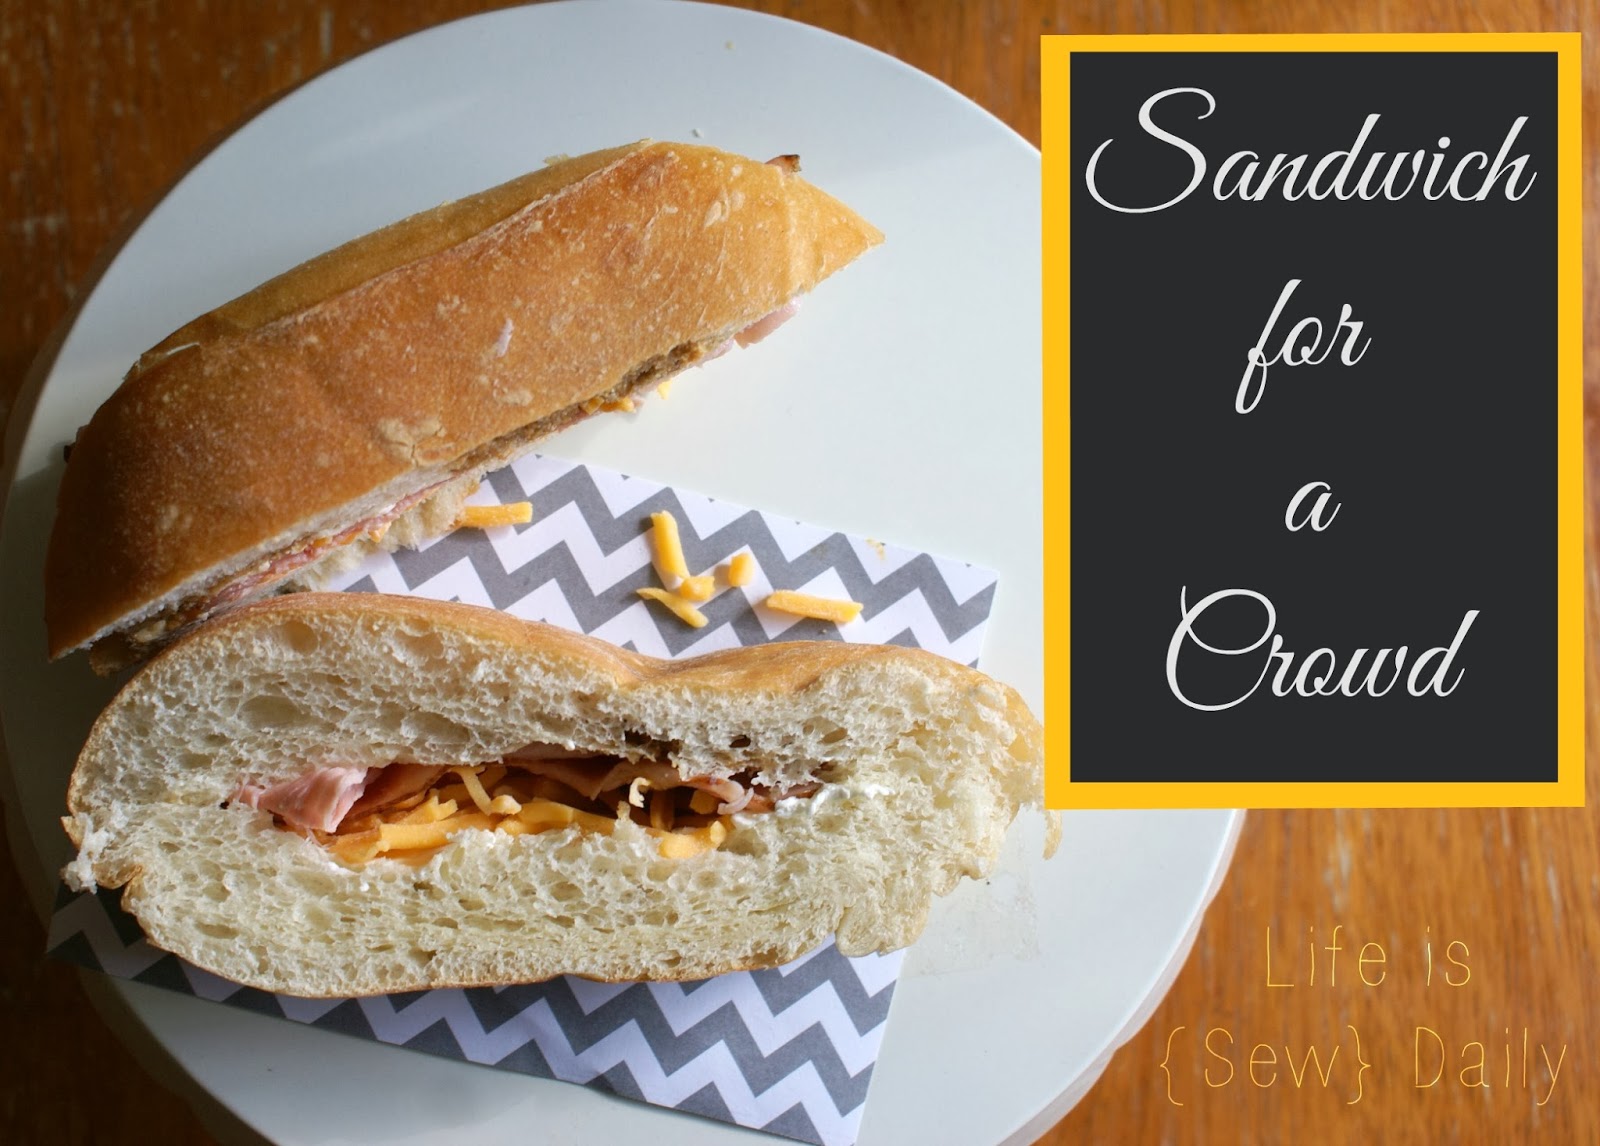
Sandwich for a Crowd {Recipe}

 
If you're looking for a delectable savory food to take to an upcoming party or get-together this holiday season, look no further! This is my most favorite party food ever!! It's even a good choice to feed your host of relatives at Christmas or New Year's.

This Sandwich for a Crowd is always a big hit when I make it. I just made it for a bridal shower a few weeks ago and had lots of people comment on how much they loved it. I make this for my family every once in awhile and we love it. This sandwich comes with a warning, though: Have plenty of people present to help you eat it - or you'll eat the whole thing yourself. {Don't ask me how I know.}

Here's the delicious recipe!

1 wide loaf soft bread {Italian loaf or French Bread in bakery section}
1 block cream cheese, softened
1/2 cup Mayonnaise {optional}
3 T Worcestershire
1 1/2 cups cheddar cheese, shredded
1 T garlic salt
chopped green onions {or 1T onion powder}
Deli ham or turkey
Cut bread loaf in half lengthwise.
Pull some of the bread away from the center of the loaf, just enough to make a little dent. This sandwich is loaded and needs a little extra space.
 
Mix together cream cheese, mayo, worcestershire, cheese, garlic salt and onions.
Spread this onto each side of the bread. Cover every part of the inside of the bread on each piece.
Now, place sliced of ham or turkey {as many or little as you wish} onto the bottom piece of the loaf.
Put the top piece of loaf onto the top. This will look like a giant sub sandwich.
 
Wrap in plastic wrap tightly and chill in fridge for at least an hour.
 
Once chilled, unwrap sandwich and slice the entire loaf into 1 inch thick slices.
Feed the hungry crowd!

What do you feed your crowd? Have a favorite that you always bring to the party?

Thanks for stopping by! I'm sharing this with a few of these people.
post signature

Monday, November 4, 2013

How to Make a Last-Minute Poodle Skirt

When your daughter comes to you the week of Halloween during your last week of blogging for 31 Days straight and it's one of your busiest weeks with various other activities going on and tells you she needs a poodle skirt, what are you suppose to do? The only option I had was to make one. And it just so happened that I had no time to do it until the day before the 50th Day of School Celebration. Our K5ers celebrate the 50th day by having a sock hop and doing all kinds of activities around the number 50. The kids are encouraged to dress in 50's fashion, although they have no clue what that means, and my little princess just had to have a poodle skirt. So, this is how I did it. And if you find yourself suddenly needing a poodle skirt, this tutorial is for you!

Please keep in mind that this tutorial is costume quality - meaning it will not be sewn exactly by the rules. My goal was to make a skirt as quickly as possible with as little resources possible. I literally made this in 30 minutes (if you exclude the breaks I had to take to run 3 different unrelated errands in between time). It will still last for years if it is properly taken care of.

NEXT:
With right sides of fabric together, sew each side seam together using a standard stitch with 3/4" seam allowance. Pin each side first if you need to.
THEN:
Turn right side out and fold over the rough cut edge about 1 inch. {If you want a finished seam on the inside of waistband, fold over once - iron. Then, fold over again - iron.} Now, sew a seam close to the bottom edge of the section you just folded over. Remember to leave about a 3 inch wide opening so you have room to slide in your elastic. Slide in your elastic and sew the opening closed.
For a full tutorial on sewing an elastic waist skirt, go here.
 
I found mine here. I printed it and then enlarged it on my copier to 150%.


My little 50's girl had a swell day making a fruit loop necklace with 50 pieces, crafting several things about the #50 and hula hooping at her sock hop while drinking her first coke float. I'd say it was a good day! I only wish I had taken a pic of her before school!

Like this post? Will you please share it with your friends on your social media? You can also follow me on Facebook, Google+, Pinterest and Twitter. Click the social media icon of your choice in the right sidebar.

Thanks for reading! I hope you come back soon!
post signature

Friday, October 4, 2013

How to Plan a Party or other Themed Event {+ free printable}

Have you ever planned a party or other themed meal? If so, you know there is alot of preparation involved. I love a themed meal/event, but it's been awhile since I've planned one or attended one other than a birthday party. Hubs & I work in the college class at our church and college years are great for themed events! Last year, we had a Pancakes & Praise event and a Christmas costume party that were super fun. We did have a cookout at our house this past summer. Although, there was no official theme, I used red/white/blue accents as the focus.
Themed meals/events may seem a little overwhelming to plan, but if you use a detailed plan like the one below, you'll see it isn't as hard as it looks.
Themed Meal Plan by Life is {Sew} Daily - Click link to download or print.

{There are two pages, so don't forget to scroll down for second page.}
Here are a few inspiration boards for themed meals/events that I'd love to host!
How do you plan for themed meals/events? Do you use Pinterest to keep up with all of your inspiration or as an idea board? This has challenged me to plan my own themed meal soon! Has it inspired you?

This is part of my 31 Days of Home Economics series that you can follow here. Please follow along and share with your friends!

I'm sharing this with some of these friends!
post signature

Monday, July 1, 2013

Simple July 4th BBQ

Nearly everyone is gearing up for some fun BBQ'ing for the 4th of July that is rapidly approaching. I'm in the same boat and decided that since we were having a bunch of college kids over last night for a BBQ, I'd just make a July 4th theme to go with it.
I had a great time decorating with simple, inexpensive things.
Just simple, little touches but they make a big impact and help to add just that special touch of hospitality that makes everyone feel welcome.
It doesn't have to take a ton of time or money to make it special.
Add a little praise & worship through testimonies and singing...
and a few games of Head's Up {iPhone app}...
and you've got yourself a fun time. And pictures to prove it.

More July 4th fun projects to come!

Thanks for stopping by!

Sharing this with some of these friends.

Wednesday, May 22, 2013

Things to Do This Summer {Picnic Edition}

It's that time again! Time to make some plans for the summer to keep from hearing those two little words: I'm boooooored! So, as I have been making lists and brainstorming about all the wonderful, fun and happy things to do this summer with my kids and as a family, one theme keeps recurring: Picnics! I love a good picnic whether it's just eating supper on the back patio, going to a park, etc. The whole family enjoys it! Here are a few ideas I found that I may incorporate into our summer and thought I'd share with you.
Use these adorable printables to invite friends out for a fun summer evening picnic! Have it at a local park, in your backyard or even indoors. Make it a picnic theme with lots of bright, summer colors - {Theme ideas: lemonade, citrus, gingham, floral}
Pick a color theme and make lunchtime with the kids a fun, memorable time together a few days this summer! Just carry it out to a shady spot in the backyard, lay down the blanket, eat and then read some books from the library together about picnics or just some favorite books. This is sure to leave a lasting impression on the kids! Time well spent. {Theme: by color or based on their favorite book like 'The Hungry Caterpillar'.}
{Cannot find original source for this pic.}
Sometimes, you just have to use the trunk of the car to have a picnic! These are the things memories are made of! My sister and I and a few of our girls had a picnic in the back of her suburban once and it was fun. Just park somewhere with a view and you're all set! This would be fun for a date night! I love the use of quilts for picnic blankets!
Sometimes you just have to use what you have, but when you find things like these on sale, get them and save them for picnics! Colorful paper bags, paper trays, chinese take-out boxes (these come in lots of sizes and colors at World Market), travel cups with straws (Dollar Tree), ribbon, baker's twine, cute tablecloths, etc. It's those little touches that really make people feel special and it looks like you've put a lot of thought and time into it.

And let's not forget about yummy, picnic food & drinks!!

There are so many ways to have a picnic! Find some fun ones you'd like to do and plan them! I know I'm planning to do several this summer with the family and I'm really looking forward to it! This weekend would be GREAT! Memorial Day is a great day to have a picnic, so plan one!

Follow Life is Sew Daily on Facebook!